
I thought instead of posting a whole slew of random pictures that I wouldn't have time to comment on properly all at once, I'd post only a few at a time. That also gives me time to find or take pictures of things...!
Alright, so today we have my very first miniature ever.
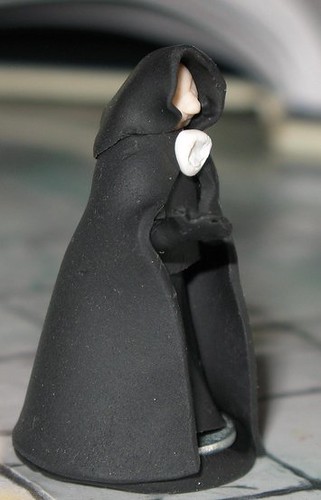
Isn't he cute. I had even less of an idea of what I was doing than I do now, which is saying something, but he's still one of the ones I get the most compliments on if I show people a group of minis. He was relatively simple - I made a head and a cylinder (slightly squashed) for the body. Originally I had been thinking I would have him raising two arms above his head as if calling some force down from another plane. Honestly, after I made the first arm, I couldn't make a second one to match closely enough. So when I made the cloak I formed it to suggest a second (nonexistant) arm underneath.
I do like him, though. There's always the shady guy in the huge black cloak, and he does look pretty at home on the map.
Issues and lessons:
- If you're going to have to make more than one of something, do them all at the same time in stages after carefully making sure you have the same amount of clay for each. Arms, legs, ears, anything.
- The clasp on the guy's cloak is almost the same size as his head. I've decided it's some sort of creepy thing carved from bone, but really I just fumbled that one a bit. Oops. :(
What I should have learned but still messed up on in later projects:
- "Eyeing it" doesn't work very well when you're working with such small sizes. I'm still not great at keeping my minis in appropriate scale to one another, but yesterday I made an unfortunate error in sizing within one miniature because I didn't compare what I was working on to the minature it was going to go with. Pictures will be included when I post that project.


0 comments:
Post a Comment